
Home / Documentation / Backups and restore
Set up a backup target, watch it run, and bring studies back when needed.
Settings → Backups → Add target opens the target editor. Give it a name and choose the type: a local folder / UNC share, an S3-compatible bucket, Azure Blob storage, or a USB drive / folder on a paired computer (written through the TekVault Agent - press List drives and click one). Set a size budget or minimum free space, press Test, then Save. Each target can follow the default schedule or have its own.
In the console: /settings/backup
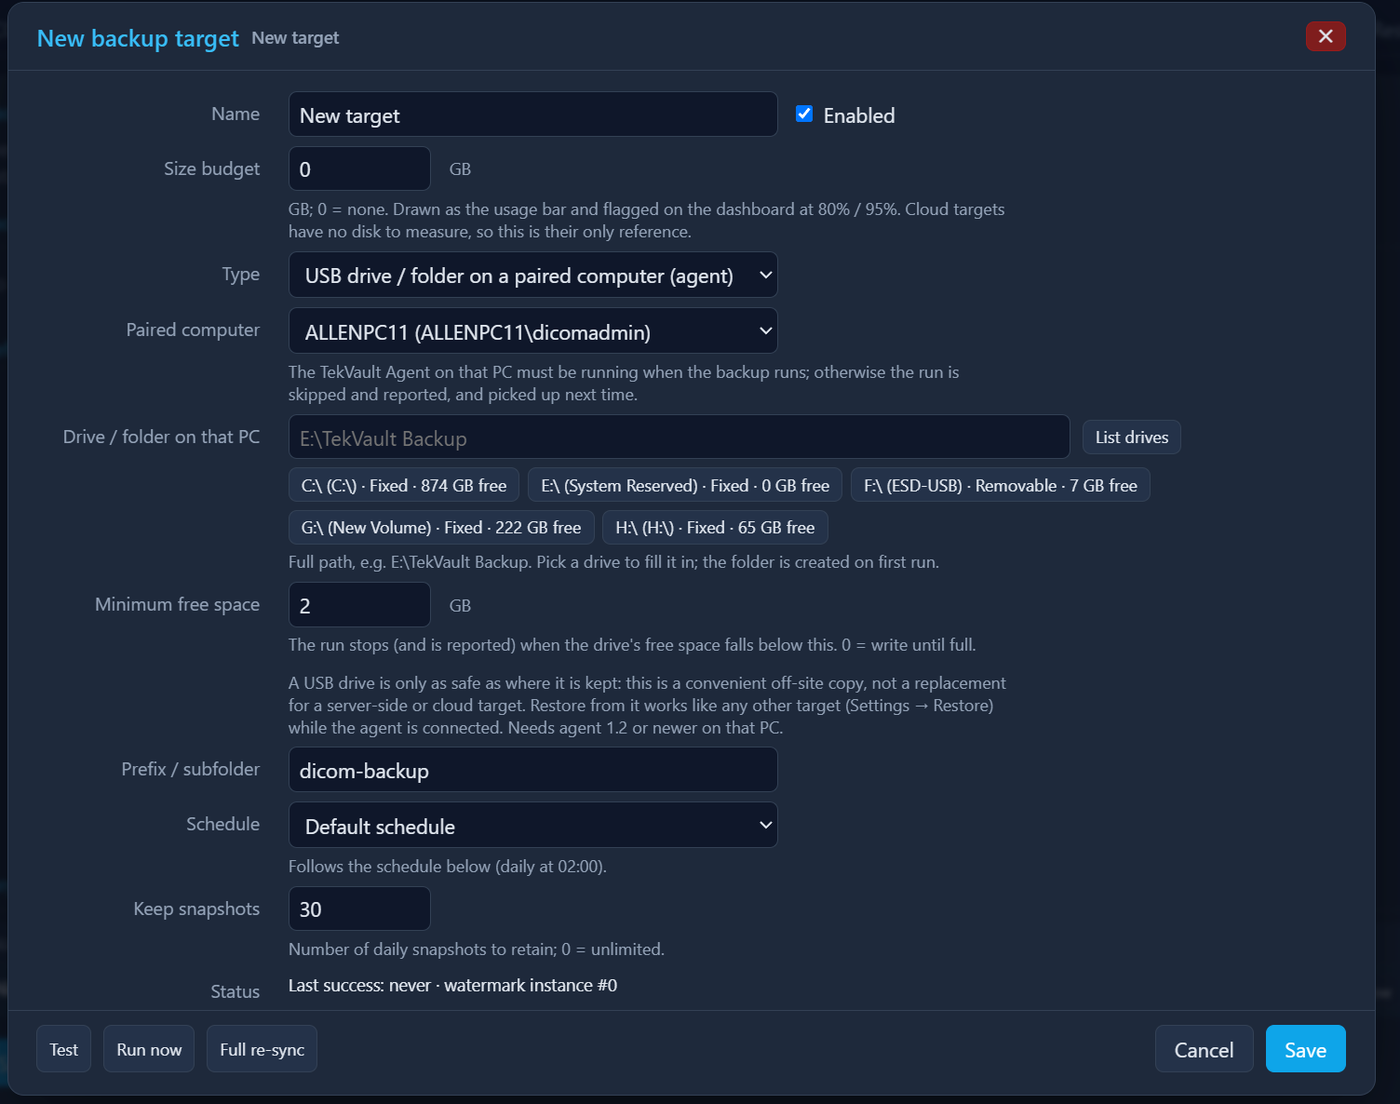
New backup target popup: USB drive on a paired computer, drives listed
Press Run now. Every image is copied incrementally (only new files on later runs) and a snapshot of the index database and configuration is stored with each run. Progress appears under Jobs with a purple bar.
In the console: /jobs

Backup job running in Jobs
The Dashboard's Backup storage card and Settings → Backups show how much each target holds; a quota turns the bar orange/red as it fills.
In the console: /
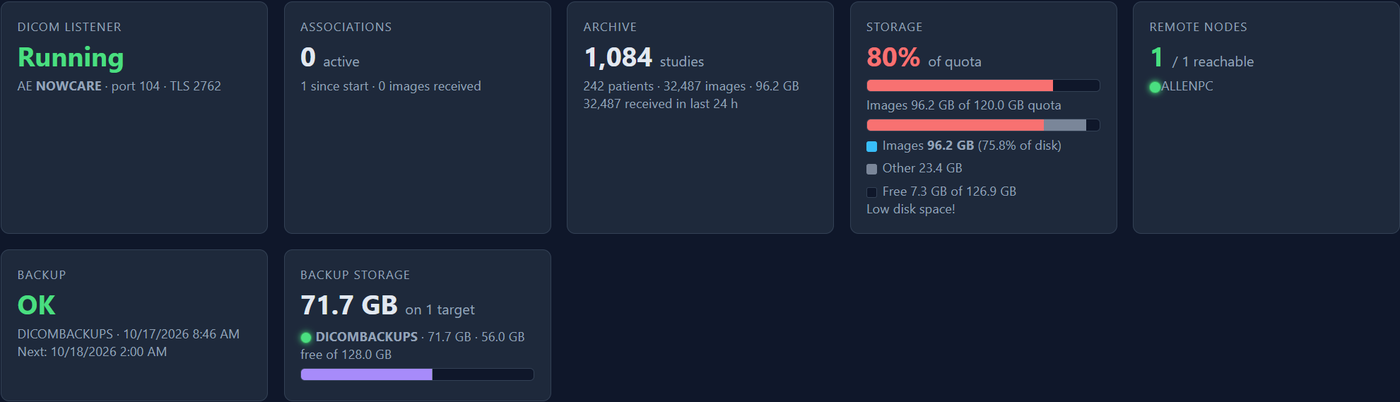
Dashboard backup storage card
Settings → Restore: pick the target, search the backup catalogue by patient, date, modality, accession or Study UID, tick the studies and press Restore. 'Restore missing files' repairs an archive with deleted files; 'Restore everything' rebuilds a new server from the backup.
In the console: /settings/restore
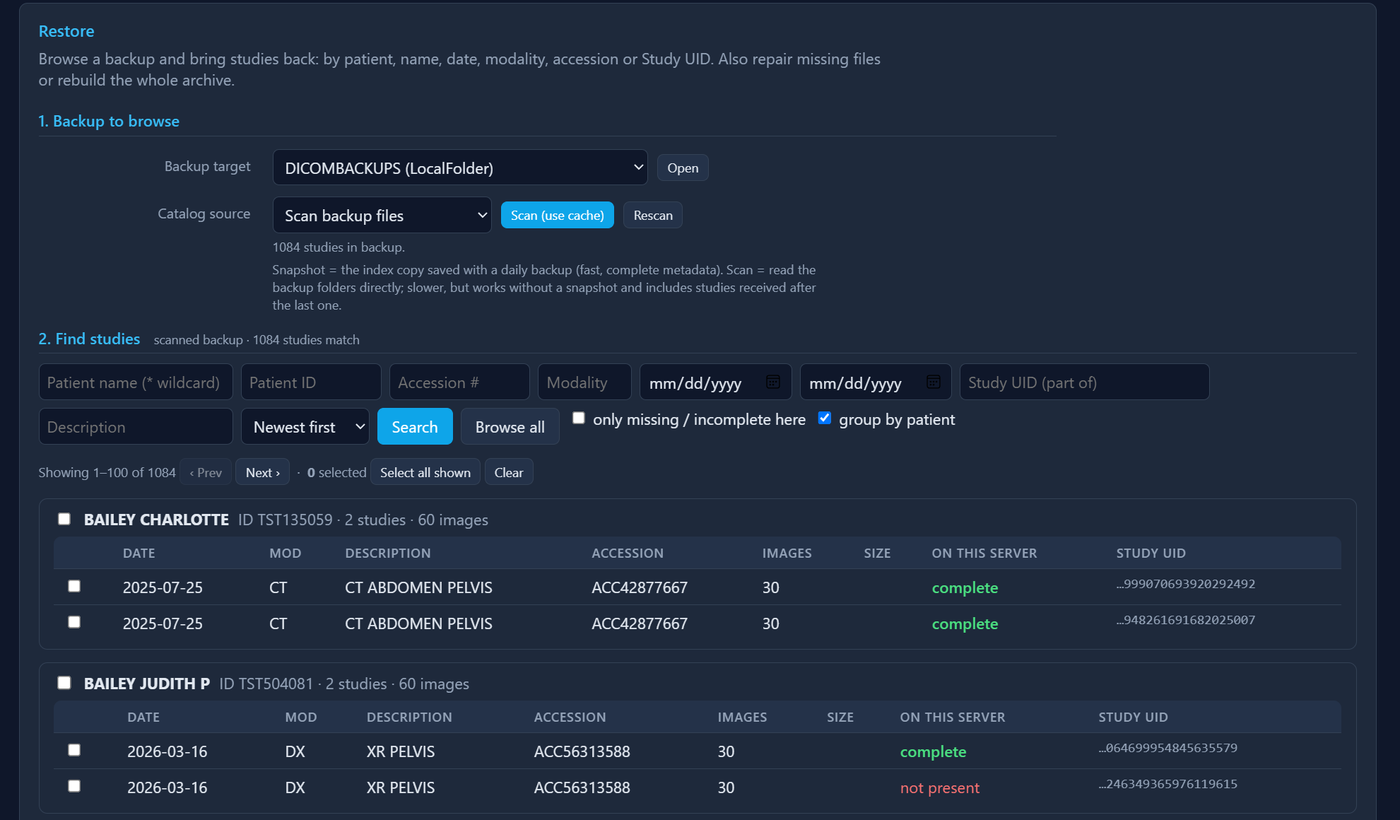
Restore page with search results
Below the catalogue: tick the studies and press Restore selected (Overwrite re-copies files that already exist). Under Other restore options, 'Restore missing files' pulls only images whose file is gone from disk, 'Restore study' takes a Study UID, and 'Restore entire archive' rebuilds everything from the backup. Every run appears under Restore jobs with its progress and result.
In the console: /settings/restore
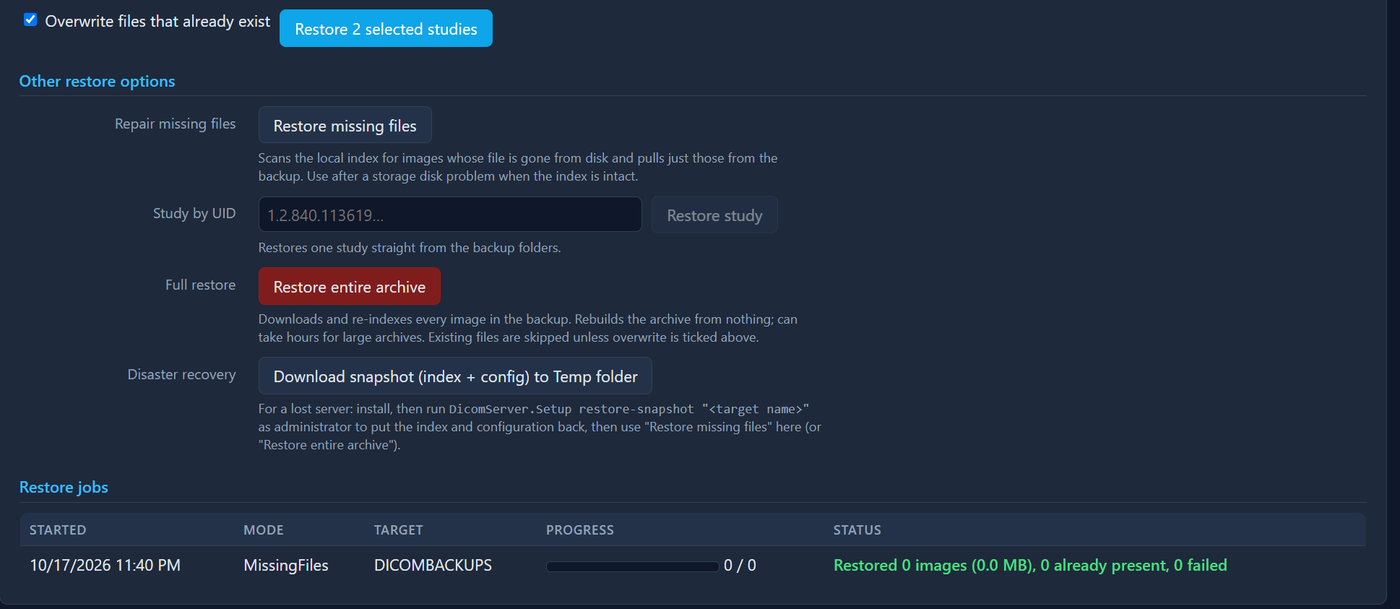
Restore page: other restore options and restore jobs