
Home / Documentation / Finding and exporting studies
Search the archive, select studies and download a ZIP or write them to a USB drive.
Open Studies. Filter by patient name (use * as a wildcard), ID, accession, modality or date range and press Search. Click a patient row to expand its studies; ▸ on a study shows its series.
In the console: /studies
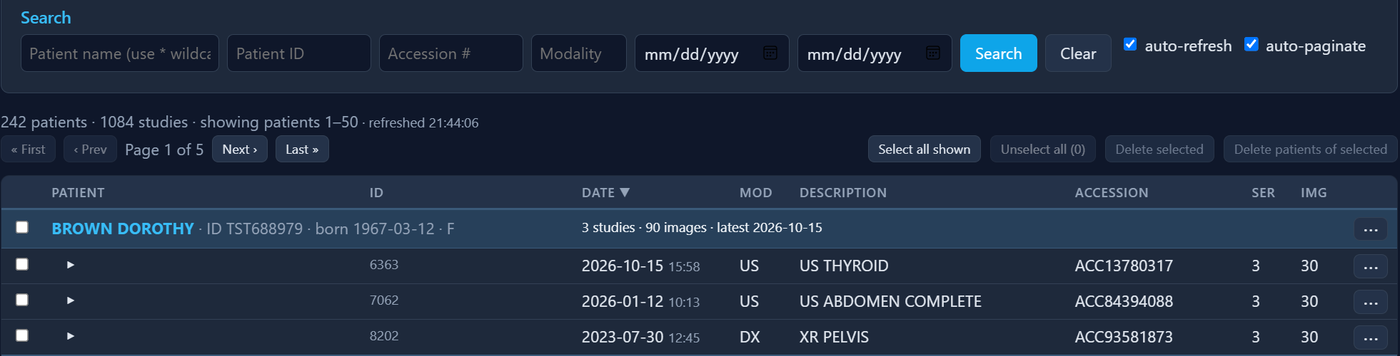
Studies page with search filters and results
The ⋯ button at the end of every row opens a menu: show the series, select only this study, jump straight to Export / Download or Send To Node with it selected, or (administrators) delete it. Patient rows have the same menu for all of a patient's studies.
In the console: /studies
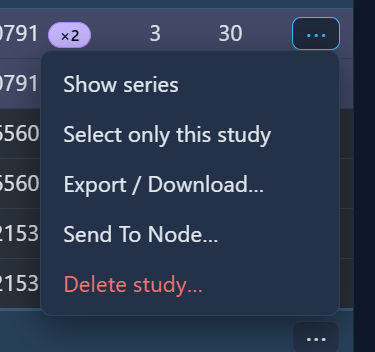
Row action menu on a study
Tick the studies you need - or the checkbox on a patient row to take all of them. A bar appears at the top with Export / Download and Send To Node buttons and the number of selected studies.
In the console: /studies
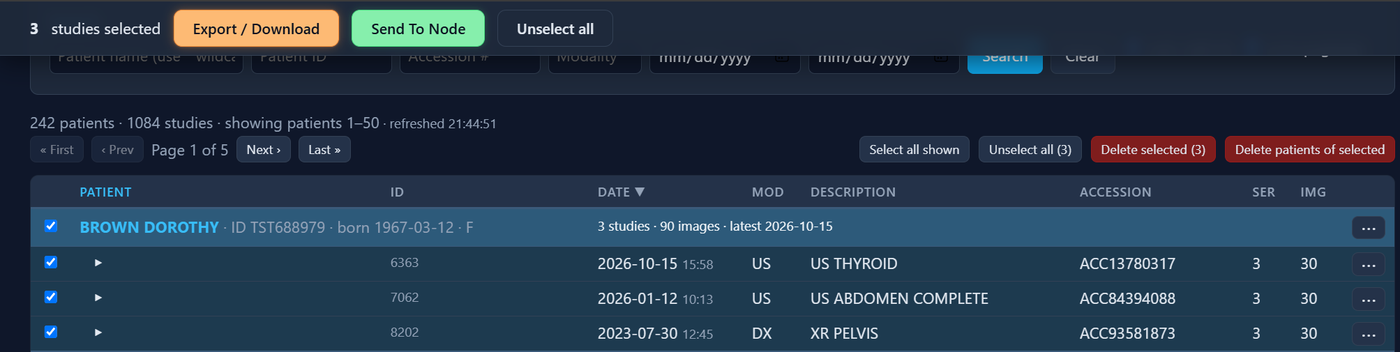
Selection bar with Export and Send buttons
Press Export / Download. Pick 'Download to this computer' for a ZIP you save from the browser, a USB drive plugged into the server, or - with the TekVault Agent installed - a USB drive on your own PC. Optionally set a folder name.
In the console: /export
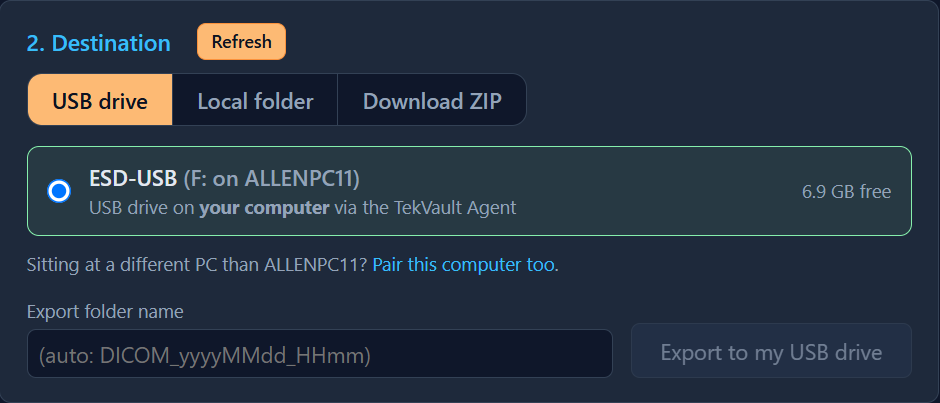
Export page destination cards
Choose Local folder. 'Folder on my computer' lets you type or browse to any folder on your PC (via the TekVault Agent); 'Folder on the server' offers the folders your administrator configured. The export folder (auto-named or the name you enter) is created inside it.
In the console: /export
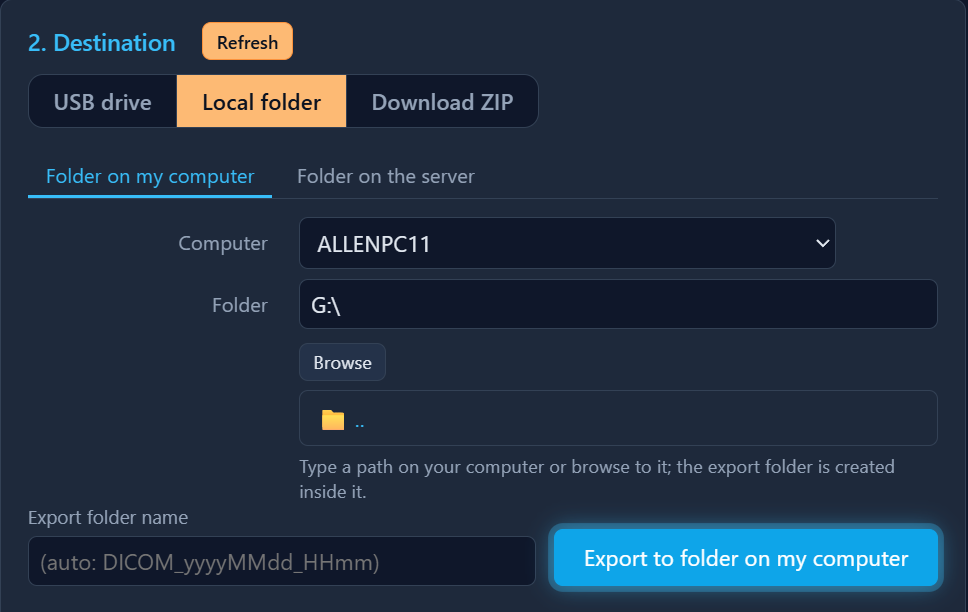
Destination card in Local folder mode with the folder browser
Press the Export button. The Export Jobs table shows progress; a ZIP shows a 'Ready to download' button when finished. Click the ⓘ badge for details and any errors.
In the console: /export

Export Jobs table with a completed job and download button
The export contains DICOM files and a DICOMDIR, readable by any DICOM viewer. Server USB drives should be ejected safely from Windows before unplugging; downloads are kept on the server for 12 hours. Administrators choose the media layout under Settings → Export: DICOMDIR on/off, 8.3 file names for maximum compatibility, the default folder name, and an optional portable viewer copied onto the drive.
In the console: /settings/export
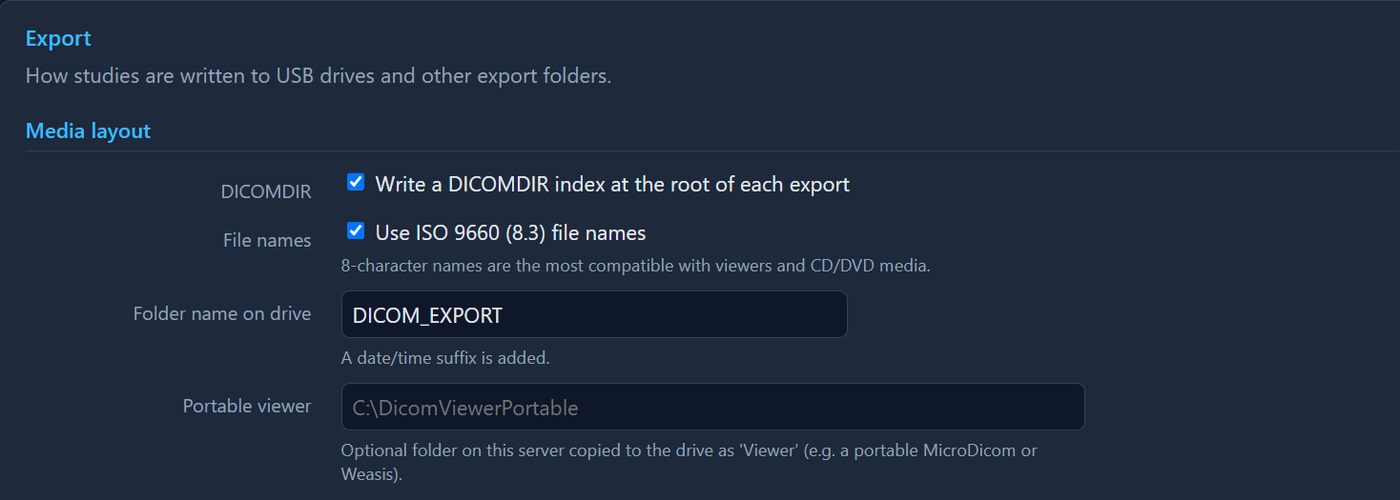
Export settings: media layout